How to Take Care of the Orchids in Your Life
Orchids are a wonderful gift to give or receive, but it’s important to know how to take care of the orchids in your life. Their beautiful blooms can last for months! This is one of the main reasons why they have become such a popular flowering houseplant.
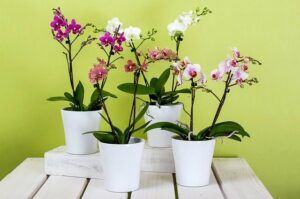 Knowing how to care for orchids is important if recurring blooms are desired. I will cover all the basics of general orchid information and will include: parts of the plant, life cycle, re blooming, light and temperature preferences, watering and feeding tips, re potting advice and propagation tricks.
Table of Contents
General Orchid Information
The most popular orchid variety sold in the United States is the Phalaenopsis Orchid, also known as “Moth Orchids”. This is the variety I will be focusing on in this article. They have large widely splayed petals, and are known for their long-lasting blooms, as well as their ability to bloom more than once during a blooming stage.
 Orchids are Epiphytes, which are plants that naturally grow without soil. They are a topical plant, and are therefore partial to more humid conditions. They prefer between 50 and 70% humidity. A humidifier, misting or pebble tray is often used to ensure adequate humidity for them to thrive.
A pebble tray is a tray filled with small rocks that is kept partially or full of water in proximity to the plant. The water slowly evaporates and provides a boost in humidity for the plant to make use of.
Orchids like at least 6 hours of indirect light. Direct sunlight will cause them to burn. Good drainage is important, as well as the correct growing medium. Using regular potting soil will most likely cause the plant to suffocate. Orchid medium is often available in the local nursery or home improvement/garden store. It is most often made up of bark, peat moss and perlite. For more information on light and watering preferences, see relevant sections below.
Parts of the Plant
Roots
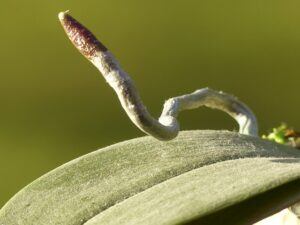 Roots are the lower portion of the plant that pull in nutrients from the growing medium. Air Roots are just what they sound like. Roots that grow above the soil line, in the open air. Healthy roots are greenish yellow and firm. Non-functioning roots will be squishy or hollow. Roots have smooth sides and a pointed tip.
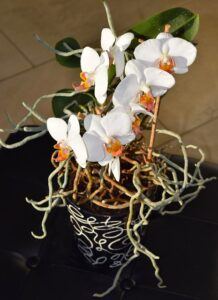 It is possible to trim back bad roots to where they look healthy. Be cautious when trimming roots, because regrowth takes a while. Do not trim any roots unless dead or rotten. Trimming can stunt growth and provide access to disease. If all roots are lost, it is often a sign of significant disease or root rot. Re pot and adjust watering schedule. (For more information on re potting and watering tips, see relevant sections below.)
Leaves
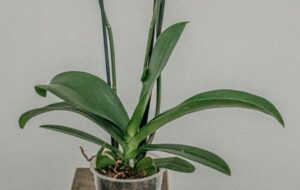 Leaves are the large, flat and green portion of the plant that provides energy to the plant through photosynthesis. Under-watered or dehydrated plants will often present wrinkled or wilted foliage. Sometimes sticky spots appear on the leaves. This most often happens in the autumn, and is the sap of the plant. The sap can be gently removed with a warm wet towel.
Look out for pests like scale- brown bumps around leaf veins and/or the crown of the plant, mealy bugs- that appear white and fluffy, or spider mites- tell-tale webbing on leaves. If a plant has a pest problem, it can produce excess sugars on the plant’s surface. If there is no indication of a pest issue, there is no reason to be concerned about the sap generation.
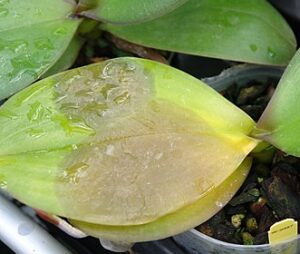 Leaves that turn yellow, they cannot recover. In due time, they will fall off. If it is only one or two leaves being lost, it typically means there is a nutrient deficiency or it is simply a part of the natural aging process. Reddish or purplish leaves is most often a sign of leaf burn. The plant is in too much or too direct sunlight.
Crown
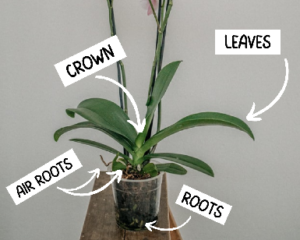 Crown is the part of the plant that the leaves come out of and the spikes grow from. Imagine the growing medium as the “head” of the royal in question, and the portion of the plant above the medium is the hair, while the last set of leaves- where they meet- is the crown of the plant.
Spikes
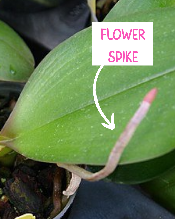 Spikes (or flower spikes) are the stems that the blooms are attached to. Often orchids put out two spikes during the blooming stage (generally once a year). If only one spike appears, it might be due to the environment being less than ideal, the health or age of the plant, or the genetics of the particular variety.
This part of the plant withers away once the blooming stage is over, and can be cut back. (Make sure to verify which stage of growth the orchid is in before cutting anything.) If the flower spike growing is yellow, it means no new blooms will come. The best course of action is to trim it back down to the base.
 When a spike is broken, it won’t heal. It cannot be re-attached, or rooted. If there are still blooms on the broken spike, simply place the base in water and enjoy it as a cut flower for as long as the blooms last. Any viable nodes below the break or cut might still put forth buds to bloom, depending on what part of the life-cycle the plant is in.
Nodes
 Nodes are specific places on the flower spike where new growth (or Keiki- see the section on propagation for more information) can develop. If the nodes are active, they will show signs of new growth. If the nodes are dormant, they will be scale-like bumps.
The Phalaenopsis orchid does best by allowing the first full set of flowers to bloom, and perhaps a couple more if the orchid is thriving and in ideal conditions. After that, the best course of action is to cut the spike about one inch above the last node that is near the crown of the plant.
Blooms
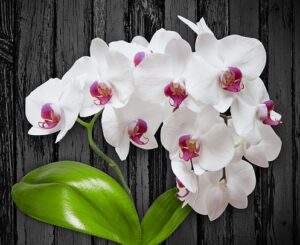 Blooms are the long-lasting flowers of the orchid, lasting most often between 2 and 4 months. Orchids put out between 5 and 10 blooms per spike. During the flowering stage, a large amount of energy is pulled from the leaves. There are often a range of sizes of the blooms from the base of the buds to the tip of the spike. The smallest of these buds are the most sensitive to low light and low humidity.
Bloom drops happen for several reasons. Sudden temperature changes, temperatures that are too high, humidity that is too low, or over/under watering. Ripening fruit put of something called Ethylene gas, and if the orchid is too near, it can shorten the bloom life. To say orchids are finicky would be an accurate statement.
 Blooms come in a wide range of colors. Some of the colors are not naturally occurring. If a gifted orchid is one that is dyed, any subsequent blooms will not be the same color. Unfortunately, the only way to get a dyed color for an orchid is by directly injecting a special type of dye directly into the spike and resealing it. The dye is not available to the public, and therefore subsequent blooms will be the plant’s naturally occurring color.
If there is a spot on the bloom, it might be a sign of an old bloom; or it might be a sign of a fungal issue called botrytis. An old bloom will fall soon after the spot develops. A botrytis bloom will stay, spot and all. Try to avoid misting blooms directly, and make sure to provide adequate air circulation to avoid the problem worsening and spreading to other blooms.
Life Cycle
After baby orchids develop their own root system and are past the seedling stage, it can take approximately 2-4 years for it to bloom. The blooming period can last between 2 and 4 months. After this, the vegetative stage is very important and key to the overall health of the plant.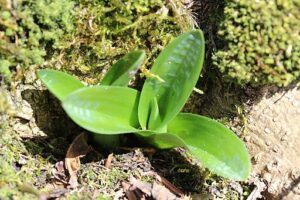
This portion of the life cycle of the orchid provides time for the leaf and root growth necessary to put forth healthy flower spikes and spectacular sprays of beautiful blooms.
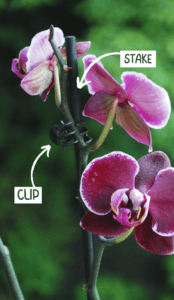 When the spikes start to grow, it’s a good idea to wait until they are at least 6 inches long before attempting to stake and clip them. This is the practice where a stabilizing stake is placed against the growing medium and alongside the growing spike to provide stability and the structural integrity for it to hold up the impending bunch of blossoms up high. Make sure to avoid any nodes when clipping, and if done between nodes, make sure to adjust as the spike grows to not encumber further development.
How Do I Get My Orchid to Re-Bloom?
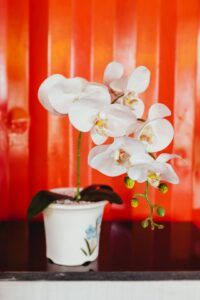 No matter what you see online, there is not magic trick or super-secret fertilizer for getting an orchid to re-bloom. There are, however, a few things to keep in mind and keep an eye on in order to increase the likelihood of a spectacular re-emergence of the ever-coveted orchid bloom!
If the distinct “mitten top” of a flower spike starts to grow, and the highly anticipated buds begin to form, stop feeding the orchid. The buds are the most sensitive part of the plant, and it is best to allow the plant to go about its development without any extra “help”.
Even Orchids Need Rest!
Allowing the orchid to rest between blooming stages is very important. There is often only one blooming stage each year, so patience is key. If environmental conditions are ideal, there is always the possibility of a second blooming stage.
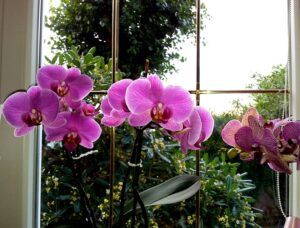 When it comes to orchids, light and temperature are the main considerations in triggering re-blooming. After the vegetative stage has provided enough root and leaf growth (and often in conjunction with the change in the seasons), cooler temperatures will help trigger a new blooming stage.
Temperatures about 60 degrees Fahrenheit ( degrees Celsius) in the evenings for around 3-5 weeks will often send the adequate signals to the plant to trigger the development of new flower spikes. Having the plant in a North or East facing window with indirect sunlight will provide the natural light adjustments in coordination with the lower temperatures to assist in the blooming stage initiation.
Light and Temperature Preferences
 Indirect light is what the orchid prefers. In fact, direct sunlight can burn leaves beyond their ability to recover, and cause bloom drop. As long as 50% of the leaf is still green, leave it attached in order to assist in energy production for recovery.
If a spike is sunburned, cutting it down to the base will allow the plant to focus on recovery. 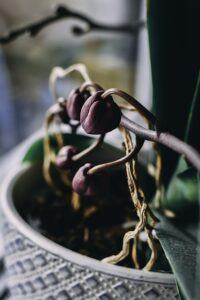 If placing orchids in a window, make it East or North in order to limit direct sunlight exposure, keep it a few feet away from the window itself, or install sheer curtains to limit exposure.
Orchids prefer temperatures between 65 and 80 degrees Fahrenheit ( degrees Celsius). Any exposure to temperatures below 55 ( Celsius) or above 85 degrees Fahrenheit ( Celsius)- even for a few minutes- can cause irreversible damage. This damage might not even be evident for a few hours or days.
Watering and Feeding Tips
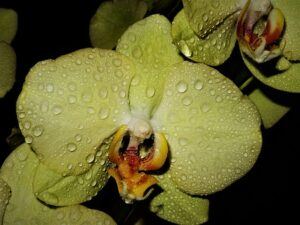 Orchids love water, especially humidity, but a little bit of water goes a long way. The most common way to water orchids is to put 3 or 4 ice cubes (depending on the size/type of ice available) under the leaves to slowly melt and provide a “slow drip” type of watering.
If the ice cube method is not preferred, there is another method for watering. This other method is soaking the roots. Take the clear grow pot out of the decorative pot, and submerge the grow pot in a couple inches of water for 2-3 minutes and allowing excess water to drip out before replacing is best.
Watering
Depending on how quickly the growing medium dries out, watering about once a week or once every 10 days is most commonly recommended. Ensuring good air circulation keeps fungal issues at bay, but a little bit of evidence of mold or fungus in the growing medium is often a sign of the decomposition process- which is good for the natural addition of nutrients into the soil. As long as it is not overtaking the plant or the growing medium, it is usually fine.
 Avoid placing orchids near drafts, or vents, as this can dry out the plant to the point where buds or blooms drop prematurely. Keeping a humidifier, pebble tray or regular misting can keep the plant from getting too dry. Avoid over-watering. If over-watered, allowing it to dry for about 10 days and then adjusting the watering schedule will help.
Fertilizers
Orchid fertilizers are available for sale, and are good to use for regular feedings. Often diluted by half, balanced fertilizers 20-20-20 (Nitrogen (N), Phosphorus (P), Potassium (K)) are preferred, but make sure any non-balanced fertilizers have low rates of Nitrogen like 8-7-6 or 10-15-10.
 Orchids utilize a very small amount of nutrients, so it is easy to over-fertilize. A sign of over-feeding is swollen, black roots. Running clean, clear water over and through the roots will help to leech any extra fertilizer from the roots. Feed monthly or bi-monthly when no new growth is evident.
If new growth is present, weekly feedings are appropriate. Make sure to check for signs of over-feeding before providing more fertilizer. Homemade fertilizer is not recommended, due to the types of nutrients that orchids call for.
Re-potting Advice and Propagation Tricks
Re-Potting
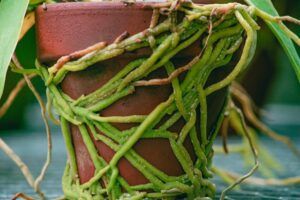 Orchids need re-potting approximately every 2 years. This is mainly to replace old growing medium, as well as provide a bit more space for the plant if it has been thriving and growing. Do not re pot during the blooming cycle, as this often causes bloom drop, and can cause accidental damage. Use a clear grow pot with good drainage in order to see the color and status of the roots clearly.
If there is a prevalence of mold in the potting medium or in the roots, immediately re pot. Gently shake clean the roots, and place all the roots in the new clear pot before adding the new, clean orchid potting soil.  Do NOT use regular potting soil. Gently press down, but be careful. Pockets of air aren’t wanted, but too much pressure can damage the roots. New air roots will grow, so if most end up under the soil, don’t worry.
If the roots themselves are very rigid, and not pliable, soak them in water for about 5 minutes to get them to become a bit more flexible. Sometimes a root will snap. As long as the root is not completely broken or removed, it will still function.
Propagation
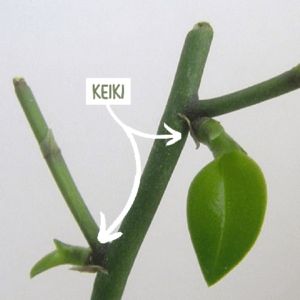 Sometimes after the first round of blooms on a spike, a keiki will develop at a node instead of another round of flowers. Keiki are daughter plants and the propagation method of orchids. Encouraging a keiki to develop roots can be done with a little patience and persistence.
While it is till attached to the mother plant, gently wrap moist sphagnum moss around the base of the keiki and secure with plastic wrap or a twist tie. Occasionally check to make sure the moss stays moist. This is a good time to check on any root development as well. Don’t over-water the moss or it will rot.
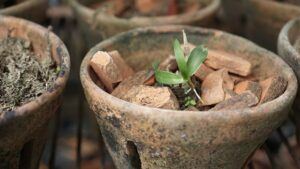 Once the blooms on the rest of the spike have faded, cut the spike back to an inch or so above the keiki. This will force the plant to put its remaining energy into the formation and development of the keiki. If further assistance is desired, I recommend seaweed extract, not keiki paste. Seaweed extract has auxin hormones which stimulates root growth. Keiki paste has cytokinin, which stimulates the growth of shoots that the keiki grows on.
Now You Know How To Take Care of the Orchids in Your Life!
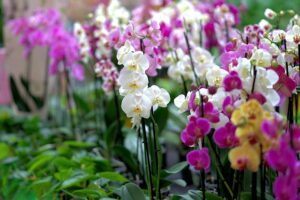 With all the beautiful colors and sizes of orchids available, now there is no doubt you know how to take care of the orchids in your life! Their ability to stay in bloom for so long has made them one of the most popular indoor flowering plants around.
While they can be a bit finicky, their care is actually quite simple. As long as the proper environmental conditions are met, basic watering and feeding schedules can keep your orchid alive and thriving for years! A little bit of knowledge can go a really long way, and make fabulous flowers last longer than ever!
Do you have any recommendations or feedback to add to the discussion? Please feel free to comment below! I answer every comment. You can also email me at Randi@FairyCircleGarden.com.
Did you like this article? Please share it on your favorite social media page! For more great content please check out our other articles and follow our social media pages on Facebook, Instagram, Pinterest and more!
Gratefully,
Randi
I was wondering when I had to water my orchards. And the answer is in the morning.
When we water in the morning, we give our orchids time to absorb the water during the day, while ensuring that the excess evaporates in the heat of the day. Naturally, evenings are usually much cooler and keep moisture in the substrate longer.
That’s exactly right! With most plants, morning watering is best for that exact reason. Another benefit to morning watering is that while any excess water that is not absorbed by the plant is evaporating, it adds to the humidity in the immediate area surrounding the plant, which helps to keep the foliage and blooms from drying out as well! Fantastic addition to the information of the article! Thank you!
What a great read about learning how to take care of the Orchids. I have received orchids to display throughout my home but they would always die off and have been told by gardeners that they were not getting enough list or the heat in my home was killing them. I’m going to follow your guide and try to take care of the orchids better this time.
I’m so glad you liked the article, and sad that you lost those orchids, but I’m sure if you follow these tips you’ll have better luck next time!