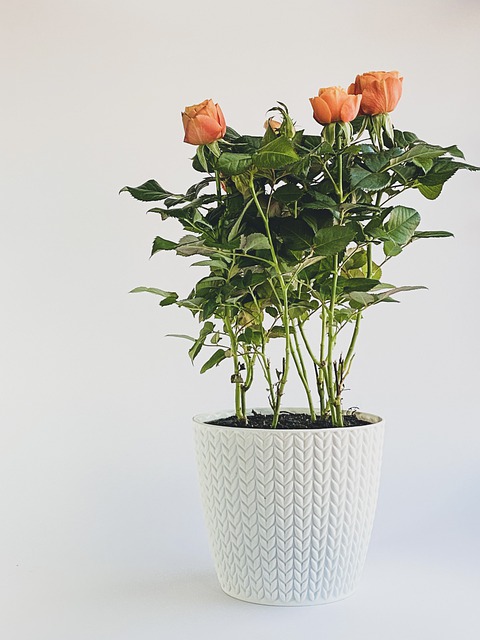
How to Grow Roses from Cuttings
 As one of the most popular cut flowers, knowing how to grow roses from cuttings can mean an almost endless supply of beautiful blooms in your very own garden! While every single cut rose might not be ideal for rooting and planting, knowing how to identify good candidates and the process to get new roots growing will increase the likelihood of success! First thing is first… what is rooting?
Table of Contents
What is “Rooting”
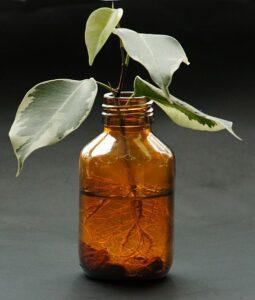
Rooting is the process by which a cut portion of a plant can be triggered to grow roots from a location that was previously attached by stem to the mother plant. There are several ways to root plants, and lots of different plants that can be rooted by different methods. Some plants are simply not able to be rooted, but are able to be propagated by other means. I’ll cover other rooting methods in a future article. For now, I’m going to focus on how to root roses.
Can You Root Cut Roses?
 Short answer is: Yes! Cut roses can be rooted and start growing a new rose bush. It’s important to keep in mind that some store bought roses are grafts of a specific type of bloom that have been grafted onto a hardier root stock. The resulting plant that’s rooted might not be as cold hardy/heat tolerant as the bush it is cut from.
Due to the fact that the rooting and sapling stage of a rose bush is more sensitive to temperature variations, there will most often be a higher success rate in the cooler months. Even so, 25-50% of attempts to root a rose cutting will end in failure.
How to Root Cut Roses
If a rose bush is available to take fresh cuttings, this will be the best chance of success. (The process can work with cut flowers purchased as well.) As with any pruning or cutting process, clean, sharp tools are essential.
- Select a 6 to 8 inch sections of stem that has at least 4 nodes on it.

- Cut at a 45 degree angle right above the first set of eaves at the top and at the base of the selected stem.
- Remove any remaining flower buds.
- Place the cut stems immediately in water.
- Remove all except for the top most set of leaves.

- Quarter the bottom of the stem about 1/3 of an inch. (Gently cut the bottom of the stem in half vertically, then do the same thing at a perpendicular angle to make the bottom of the stem lightly splay into 4 pieces.)
- Dip quartered stem into water up to about 2 inches.
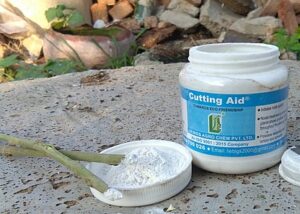
- Cover the wet end of the stem in powdered rooting hormone. (This is best done by holding the stem over a flat surface- a paper or clean mat that can help recuperate fallen rooting hormone is helpful- and gently shaking the rooting hormone over the damp end of the stem.) There are liquid, gel and powdered rooting hormones available, but for roses, powdered works best.
- Gently flick or tap the middle of the stem to gently shake off any excess rooting hormone.
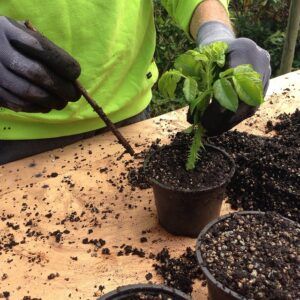
- Place a pencil or similarly sized tool into the rose growing medium so that 50% of the stem will be covered by soil. (Potting soil made specifically for roses is best for this and is available at your local garden center or nursery. Ensure the container used for this process has good drainage.) The reason for this hole is that we don’t want to shove the bottom of the stem with the rooting hormone into the soil because the rooting hormone will be wiped off the bottom of the stem by the soil, making the rooting hormone ineffective.
- Place the stem to the bottom of the hole and lightly press soil up against the stem.
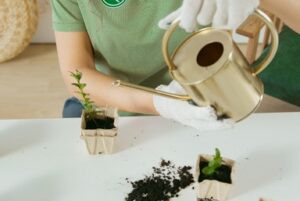
- Water the cutting every day, but do not let it get/stay soggy. It is very important that the soil does not dry out during the rooting process. However, any roots that do emerge will drown and die if the soil is water-logged. Proper drainage is important.
- Place a tall stake or other tool next to the cutting, then place a clear jar or bag over the cutting. The stake should be taller than the cutting in order to keep the leaves of the plant from lying up against the jar or bag. The stake should also be able to keep the jar/bag from lying flush with the soil. Allow for a small gap so moisture is kept within, yet able to slowly escape to keep fungal issues at bay.
- Roots will begin to form around 2 weeks.

- The cuttings can be transplanted when new leaves start to sprout.
- If transplanting outdoors, make sure the location selected has well tilled soil with good drainage. Don’t forget to harden off the cuttings before exposing them to unfettered outdoor elements.
Care After Planting
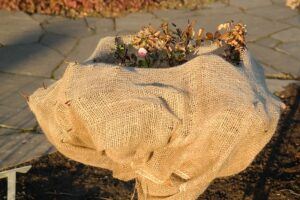 Roses most often like good morning sun and afternoon shade. Some varieties do better in different climates with different lighting and temperature, so make sure to research what type of rose the cutting is from- but on average, protecting the young plants from direct sun in the afternoon is a good idea for the first several years.
 The first years of a cutting, the plants are more vulnerable to extreme temperatures, so taking measures to protect it from extreme heat and cold will increase the likelihood of success. It usually takes around 3 years for a cutting to produce blooms, so patience is important. When that bud starts to form, and the first bloom opens- it will be worth it!
Now You Know How to Grow Roses from Cuttings
 With all the different colors, sizes and shapes of roses available- and new ones being created all the time- knowing how to grow roses from cuttings is a great skill to have! As with all things in the garden, while there may be trial and error, persistence and patience can take you far!
Do you have any recommendations or feedback to add to the discussion? Please feel free to comment below! I answer every comment. You can also email me at Randi@FairyCircleGarden.com.
Did you like this article? Please share it on your favorite social media page! For more great content please check out our other articles and follow our social media pages on Facebook, Instagram, Pinterest and more!
Gratefully,
Randi
